How to Remove Background from Images: Complete Guide 2024
Got the Perfect Photo But the Background's Ruining It?
You've got the perfect product photo, but the cluttered background is killing it. Or maybe you need a professional headshot with a clean white background for LinkedIn. Whatever your reason, removing backgrounds from images used to be tedious and expensive—requiring Photoshop skills and hours of work.
Not anymore. AI-powered background removal gives you professional results in literal seconds. No technical skills needed.
Let's walk through exactly how to do it.
Why Remove Image Backgrounds?
For E-Commerce & Product Photography
Clean backgrounds increase conversion rates by up to 34%. Customers want to see your product, not your messy desk. Plus, most marketplaces (Amazon, Etsy, Shopify) require white or transparent backgrounds.
For Social Media & Marketing
Transparent backgrounds let you create eye-catching graphics that actually stand out in feeds. Plus, you can layer images anywhere—Instagram posts, stories, marketing materials—without awkward white corners.
For Professional Use
Need a clean headshot? Presentation graphics? Website images? Background removal makes everything look more polished and professional.
Methods for Background Removal
AI-Powered Removal (Recommended)
Pros:
- Instant results (1-5 seconds)
- No technical skills required
- Free tools available
- Batch processing for multiple images
Cons:
- May need touch-ups on complex images
- Quality varies by tool
When to use: 95% of projects. Product photos, social media, quick edits, bulk processing.
Manual Removal (Photoshop/GIMP)
Pros:
- Maximum control for ultra-complex images
Cons:
- Steep learning curve
- Time-consuming (10-30 minutes per image)
- Expensive software
When to use: High-end commercial work or when AI struggles.
Step-by-Step: Remove Backgrounds with AI
Step 1: Access the Tool
Visit Instacut Studio's Background Remover. No signup required—you can start immediately. Your privacy is protected (no data stored).
Step 2: Upload Your Image
Three ways to upload:
- Drag & drop (easiest)
- Click to browse your files
- Paste from clipboard
Supported formats: JPG, PNG, WebP, HEIC (mobile photos)
Privacy note: Your image processes entirely in your browser. We don't upload, store, or access your photos.
Step 3: AI Does Its Magic
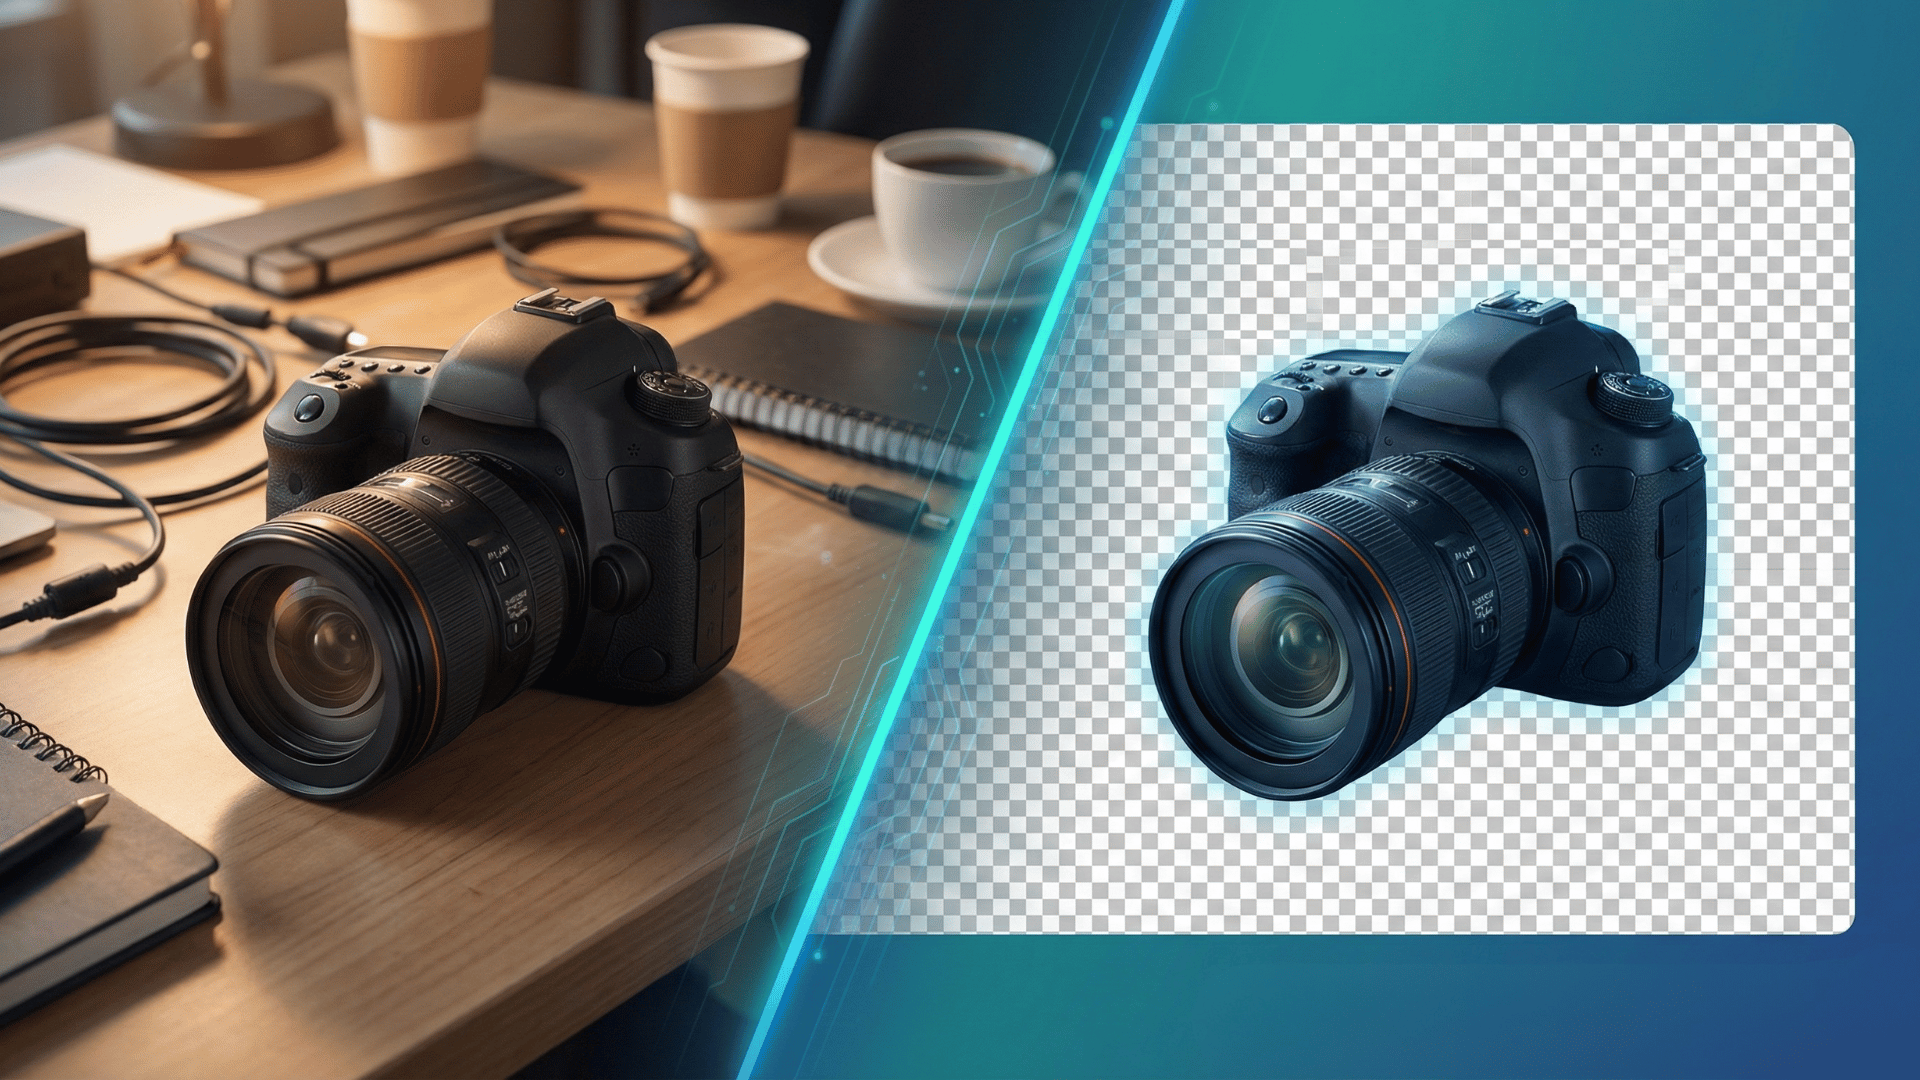
The AI analyzes your image in 1-3 seconds. It identifies the subject vs. background, creates precise edge maps, and generates a transparent background.
Step 4: Review the Result
Check for:
- Clean edges around subject
- No artifacts or halos
- Hair/fur details preserved
Use different preview backgrounds (checkered, white, black) to spot any issues.
Step 5: Fine-Tune (If Needed)
Most images are perfect as-is. But if needed, use:
- • Edge refinement slider
- • Feathering for softer edges
- • Manual touch-up brush
When fine-tuning helps: Complex hair, transparent objects, low-contrast images.
Step 6: Download Your Image
Format options:
- PNG (recommended for transparent backgrounds)
- JPG (with custom background color)
- WebP (smallest file size)
Choose original resolution to maintain quality.
Advanced Tips for Perfect Cutouts
Use High-Quality Images
Clear, well-lit photos work best. Avoid blurry or pixelated images. If your image is blurry, the AI will struggle—retake the photo or use an upscaler first.
Ensure Good Contrast
The subject needs to stand out from the background. High contrast = better results.
Handle Complex Elements Carefully
Hair & Fur: AI handles these surprisingly well, but extreme cases (curly hair on similar-colored backgrounds) might need manual touch-ups.
Transparent Objects: Glass, water, and plastic are tricky. For best results, use manual methods or accept slight imperfections.
Common Mistakes to Avoid
Mistake #1: Using Low-Quality Images
Garbage in, garbage out. Start with the highest quality available.
Mistake #2: Saving in Wrong Format
JPG doesn't support transparency. Always use PNG for transparent backgrounds.
Mistake #3: Ignoring Lighting Consistency
When compositing onto new backgrounds, match the lighting direction and intensity. Otherwise, it looks fake.
Mistake #4: Not Checking at 100% Zoom
Always zoom in to inspect edges for artifacts or rough spots.
Mistake #5: Using Tools That Compromise Privacy
Many tools upload your images to their servers. With Instacut Studio, everything processes in your browser—complete privacy.
Common Questions
Is AI as good as manual Photoshop work?
For 90% of use cases, yes. AI excels at portraits, products with clear edges, and moderately complex backgrounds. Ultra-high-end commercial work might still benefit from manual editing.
Will the quality be good enough for print?
Absolutely. Start with at least 300 DPI images, export at original resolution, and use PNG format.
Can I remove backgrounds from multiple images at once?
Yes. Instacut Studio offers batch processing—perfect for e-commerce catalogs, event photography, or product lines.
Is my image data safe?
With Instacut Studio, absolutely. Browser-based processing means your images never leave your device. No data storage, no AI training on your photos, no tracking.
What if the AI makes mistakes?
AI is typically 95%+ accurate. If you notice issues, try adjusting the source image (better lighting, contrast) or use the fine-tuning tools.
The Bottom Line
Background removal is easier than ever with AI. No technical skills required, no expensive software, and results in seconds instead of hours.
Whether you're selling products online, building your personal brand, or working on creative projects, AI-powered background removal puts professional results at your fingertips—instantly and free.
Ready to Remove Backgrounds in Seconds?
Try Instacut Studio's free background remover now—no signup required, complete privacy, professional results.
Remove Background NowYour images stay in your browser. We never see them. That's the whole point.